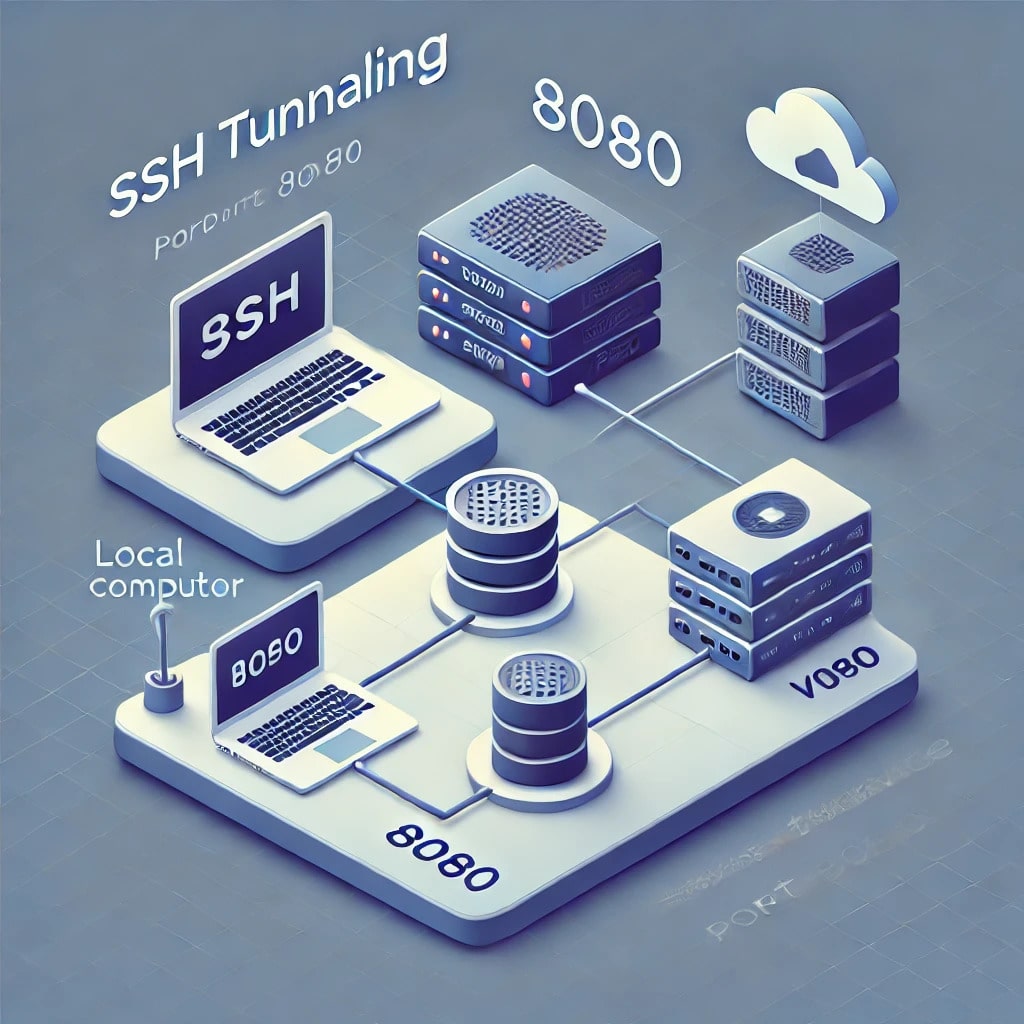
1. Open Port 8080 on Your VPS
To allow incoming connections on port 8080, open it using a firewall tool like UFW. Run the following commands:
sudo ufw allow 8080/tcp
sudo ufw reload
2. Configure SSH on Your VPS
- Edit the SSH configuration file:
- Enable
GatewayPortsby adding or updating the following line: - Restart the SSH service to apply changes:
sudo nano /etc/ssh/sshd_configGatewayPorts yessudo systemctl restart ssh3. Start the SSH Tunnel
From your local computer, create a reverse SSH tunnel by running this command:
ssh -R 0.0.0.0:8080:127.0.0.1:8080 root@__YOUR_SERVER_IP__0.0.0.0:8080: Opens port 8080 on all interfaces of the VPS.127.0.0.1:8080: Forwards requests from the VPS to your local server running on port 8080.root@__YOUR_SERVER_IP__: Replace with your VPS login and domain/IP.
4. Verify the Connection
After setting up the tunnel, your local server will be accessible at:
http://__YOUR_SERVER_IP__:8080That's it! Your local server is now exposed through your VPS without requiring additional web servers or domain configurations.
Practical Use Cases
This setup can be incredibly useful in various scenarios. For example:
- Sharing Large Files: You can share very large files with your partner or team without relying on third-party services.
- Hosting a WordPress Site with Docker: Create a WordPress site in Docker, install plugins for media galleries, and host your photos and videos to share them with whomever you want.
- Using an Inexpensive VPS: You can buy the cheapest VPS available, as the main requirement is to have a public IP address. With this, you can set up your file-sharing server.
- Internal or Family File Sharing: Create a private file-sharing service for your organization or family, where everyone can exchange photos, videos, text files, and more.
3


